General Information
Setting up Recorder
- Selecting a microphone
- Downloading & installing TechSmith Relay
- Logging in
- Selecting a profile
- Selecting an audio input
- Using automatic audio leveling
- Setting hotkeys
- Selecting a display
- Selecting a camera
Updating Recorder
Recording
- Recording a presentation
- Processing a recording
- Previewing a presentation
- Trimming a presentation
- Submitting a presentation to the server
- Guest recordings
Viewing
Linking
Portable Recorder
- Installing the Portable Recorder
- Recording with the Portable Recorder
- Uploading with the Portable Recorder
- Logging In on the Portable Recorder
GENERAL INFORMATION
What is UCI Replay?
UCI Replay is a service for the recording and playback of lectures, tutorials, meetings, events, or other types of presentations. Using TechSmith Relay, instructors, teaching assistants, and staff can capture these presentations for students to view if they miss a lecture or wish to better understand concepts discussed in class, or for other staff to view if they miss a meeting or wish to review a past event.
Who can use UCI Replay?
Only instructors, teaching assistants, and staff can record and upload presentations to UCI Replay. However, students may view the recordings that instructors or staff provide to them. People with no UCI affiliation may also view recordings if those recordings are put in the public directory by the presenter.
A student may be able to record and upload content if he or she has a faculty sponsor or staff supervisor that approves it. If that is the case, please email replay@uci.edu with the name of the faculty sponsor or staff supervisor so we may get the appropriate approvals to enable UCI Replay for the student. As an alternative, if you are looking to capture video snippets, there are free services open to you such as TechSmith’s Jing.
About TechSmith Relay
UCI Replay uses TechSmith Relay for recording.
We have provided instructions on how to download, install, record with, edit with, and submit with TechSmith Relay below. For more information on the software itself, visit the TechSmith Relay website. For help with making your first recording, watch this tutorial.
Playback requires a browser that can read HTML, FLV, and MP4 files in order to stream the recordings from the webpage. You may also use iTunes or any other MP4-supported media player for playback. If you have any questions regarding playback format, please contact replay@uci.edu.
If you require additional user accounts, a customized solution for file hosting, or file conversion (format and size), please contact replay@uci.edu.
What’s new?
For a full list of new features, visit our What’s New? page.
SETTING UP RECORDER
Selecting a microphone
TechSmith Relay supports the use of both internal (built-in hardware) and external (plugged-in) USB microphones.
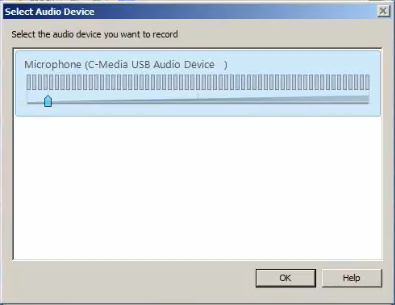
All SmartClassrooms are equipped with a microphone for use with UCI Replay. In those classrooms, TechSmith Relay defaults to the installed microphone, which is listed as “C-Media USB Audio Device”. If you wish to use your own microphone, you will have to select it manually.
| The SmartClassroom podium computers will only accept USB microphones. The UCI Computer Store has several USB microphones you can choose from. Be sure to double-check the packaging for a USB connector. |
We have tried Blue Microphones’ Snowflake USB Microphone, available at the UCI Computer Store, Amazon.com, and elsewhere online, and we can say that it works well.
It should be noted that microphones that have a headphone jack on the back may redirect sound from the computer’s speakers to the headphone jack whether or not there are headphones plugged in. Consequently, using microphones with headphone jacks is not recommended as this may prevent sound from being properly recorded with your presentation.
Downloading & installing TechSmith Relay
Existing TechSmith Relay users: Please refer to our update section for installation instructions for the latest version of TechSmith Relay.
This guide is also helpful for downloading and installing TechSmith Relay.
- Go to https://help.replay.uci.edu/download-recorder and download the appropriate recorder for your operating system.
- Locate the downloaded file and follow your computer’s procedure to install.
| Portable recorder users should follow these instructions for installation. |
| The TechSmith Relay software should now be downloaded and installed. |
Logging in
- Run TechSmith Relay on your computer.
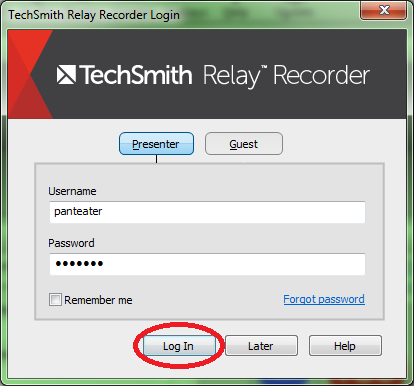
- Enter your UCInetID and password into the Username and Password fields.
- If you do not have an internet connection, log in as a Guest.
You should only log in as a guest if you do not have an internet connection or you do not have an account. - Click Log In.
| You should now be logged in to TechSmith Relay. |
Selecting a profile
After logging in to TechSmith Relay, you will need to select a profile for your recording. The profiles determine who will be able to view your recording after it is encoded.
Public and Advertised
Anyone can access media with this profile, regardless of his or her location and UCI affiliation. Files are publicly listed in a Public directory on the UCI Replay website.
UCI-Only and Advertised
Media with this profile can only be accessed from computers that are on-campus, are in residence halls (including Vista del Campo), or are “virtually” on campus via a VPN connection. Files are publicly listed in a UCI Only directory on the UCI Replay website.
Testing/Temporary
All files in testing will be automatically deleted after 10 days. Files are only accessible by direct URL (sent by email or linked on https://encoder.replay.uci.edu) and will not be listed in any UCI Replay directory. Users should use the “Testing/Temporary” profile as a temporary space for individual recordings, private recordings, or self-recordings that they do not mind being deleted after 10 days.
Public and Unlisted
Anyone can access media with this profile, regardless of his or her location and UCI affiliation, but none of the media will be listed in a public directory. The presenter must provide a link to the presentation to anyone they want to have access to it.
UCI-Only and Unlisted
Media with this profile can only be accessed from computers that are on-campus, are in residence halls (including Vista del Campo), or are “virtually” on campus via a VPN connection. None of the media will be listed in a public directory. The presenter must provide a link to the presentation to anyone they want to have access to it.
University Extension
This profile is for use by University Extension instructors to share presentations with their students. None of the media will be listed in a public directory. The presenter must provide a link to the presentation to anyone they want to have access to it.
Selecting an audio input
If you are using the podium computer to run TechSmith Relay, you do not need to select an audio input. It should automatically use the installed classroom microphone attached to the podium.
You can select a specific audio input for recording sound. Presenters who use laptops will need to have a built-in microphone or a USB microphone that does not require a driver. You can use an external microphone while recording a presentation using TechSmith Relay. Presenters will need to select the USB microphone as the audio source. It is recommended to test the microphone by saying “123” while watching the audio input level in TechSmith Relay. If you do not select the external microphone, TechSmith Relay will automatically select the internal microphone if one exists.
Select an audio input:
- Plug in your microphone or audio input, if it is not already connected.
If you do not plug in and select the external audio device before recording, it will not be used. - Log in to TechSmith Relay.
- Press the Audio icon that looks like a microphone.

- Select the desired input device.
- Press OK.
| The desired device should now be selected as the audio input. |
For a more in-depth look at selecting an audio input, see TechSmith Relay Recorder Help and look for Audio Devices in the Table of Contents.
Using automatic audio leveling
The automatic audio leveling feature automatically adjusts the volume of the sound recorded by the microphone. When the speaker’s volume increases or the speaker gets closer to the microphone, TechSmith Relay will reduce the volume of the recording. When the speaker’s volume decreases or the speaker gets farther from the microphone, TechSmith Relay will raise the volume of the recording. This is done intelligently without user input.
Disable automatic audio leveling:
- Log in to TechSmith Relay.
- Find the Audio Input Level section. If the Auto icon is grey, then automatic audio leveling is already disabled.
- If the Auto icon is green, click it and it will become grey.

| The automatic audio leveling feature should now be disabled. |
Enable automatic audio leveling:
- Log in to TechSmith Relay.
- Find the Audio Input Level section. If the Auto icon is green, then automatic audio leveling is already enabled.
- If the Auto icon is grey, click it and it will become green.

| The automatic audio leveling feature should now be enabled. |
For a more in-depth look at using automatic audio leveling, see TechSmith Relay Recorder Help and look for Auto Adjust Audio Level in the Table of Contents.
Setting hotkeys
Setting hotkeys is optional. Hotkeys allow the user to start, pause, and stop recording with keyboard shortcuts so that these operations may be performed quickly and invisibly (without moving the cursor while recording).
Setting hotkeys:
- Log in to TechSmith Relay.
- Press the Hotkeys icon.

- Assign the desired hotkeys.
- Press OK.

| Hotkeys should now be assigned. |
For a more in-depth look at setting hotkeys, see TechSmith Relay Recorder Help and look for Hotkeys in the Table of Contents.
Selecting a display
TechSmith Relay gives the option of selecting the display that it will capture when the user has multiple monitors. If you only have one display, then TechSmith Relay will default to that display and no further action needs to be taken.
Selecting a display:
- Log in to TechSmith Relay.
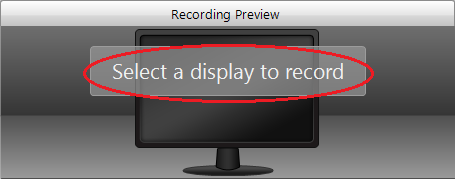
- Press “Select a display to record”.
- Select the display you wish to record.
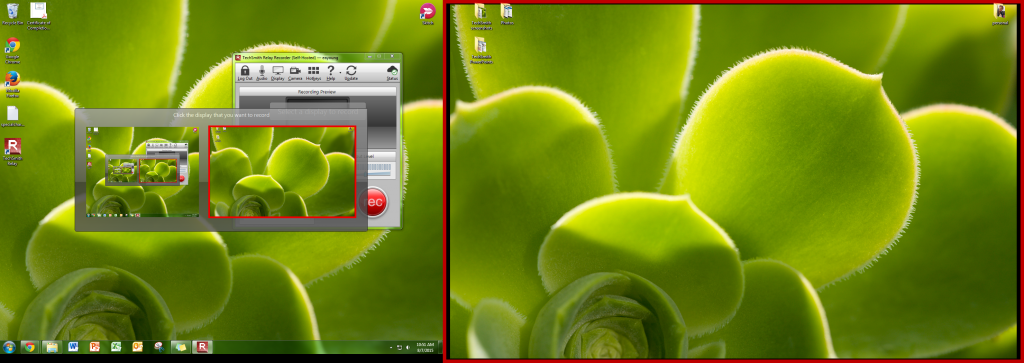
- You should get a confirmation, and the selected display should show up in the Recording Preview box.
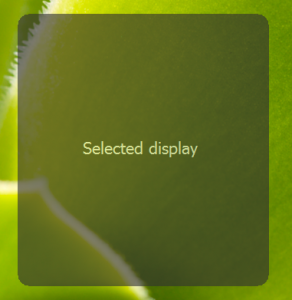
| TechSmith Relay should now record only the selected display. |
For a more in-depth look at selecting a display, see TechSmith Relay Recorder Help and look for More Than One Display in the Table of Contents.
Selecting a camera
You can use a connected webcam to record yourself in addition to the lecture slides and other materials being recorded onscreen. The camera recording will be shown in a small window in the bottom-right corner of the presentation.
Selecting a camera:
- Log in to TechSmith Relay.
- Press the Camera icon.

- Select the camera you wish to record.
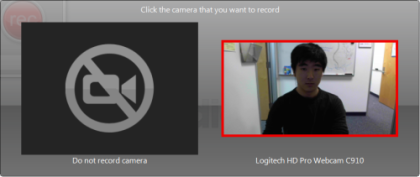
| You should now have enabled the webcam for recording. |
For a more in-depth look at selecting a camera, see TechSmith Relay Recorder Help and look for Record with a Camera in the Table of Contents.
UPDATING
Checking version number
You may already have the latest version of TechSmith Relay installed. If so, there is no need to update. If you aren’t sure which version of TechSmith Relay you have, you can follow these instructions to check. Afterwards, proceed to follow the update instructions for the corresponding operating system and TechSmith Relay version.
If you are using a Windows computer:
- Run TechSmith Relay on your computer.
- Press the small arrow next to the question mark icon.
- Click About.
- If your TechSmith Relay version number does not match the version number at the top of the download page, you are using an old version and should update using the instructions below.
| You should now know what version of TechSmith Relay you have. |
If you are using a Mac (Mac OS X):
- Run TechSmith Relay on your computer.
- Click TechSmith Relay in the menu bar at the top.
- Click About TechSmith Relay.
- If your TechSmith Relay version number does not match the version number at the top of the download page, you are using an old version and should update using the instructions below.
| You should now know what version of TechSmith Relay you have. |
Updating TechSmith Relay
Check out what’s new in the latest version of TechSmith Relay.
Updating TechSmith Relay for Windows or Mac OS X:
- Download TechSmith Relay for your computer.
- Locate the downloaded file and follow your computer’s instructions for installation.
| The latest version of TechSmith Relay should now be downloaded and installed. |
Updating TechSmith Relay Portable Recorder:
- Follow these removal instructions to remove TechSmith Relay from your portable device.
- Download TechSmith Relay for your portable device.
- Locate the downloaded file and follow this guide for How to install TechSmith Relay on your portable USB drive.
| The latest version of TechSmith Relay should now be downloaded and installed. |
RECORDING
Recording a presentation
These guides are also helpful for using TechSmith Relay.
- Log in to TechSmith Relay.
- Select a profile for the recording.
- Enter a title.
If your presentation is for a class, consider putting the class name in the title.
Example: Chem 51C: Carboxylic Acids - Optional: Enter a description.
If your presentation is for a class, consider briefly describing the contents of the lecture.
Example: This lecture explains carboxylic acids and the process of their synthesis in industry and science. - Optional: Press the blue test button to demo the recording process. This will initiate a recording that will not be permanently saved or uploaded anywhere but can be played back for testing.

- Press the red rec button when you are ready to begin recording.

- Press Pause if you need to pause the recording at any time during the presentation.

- Press Stop when you are finished recording the presentation.

| Consider setting hotkeys to facilitate pausing and stopping a recording. |
| You should now have recorded your presentation. |
For a more in-depth look at making a recording, watch this tutorial.
Processing a recording
Recordings are automatically processed and transferred to our storage server when you submit a presentation. You can track recording transfer and processing time by visiting https://encoder.replay.uci.edu.
Previewing a presentation
- Record a presentation.
- Press Play to preview your presentation.

| You should now be previewing your presentation. |
For a more in-depth look at previewing your presentation, see TechSmith Relay Recorder Help and look for Preview and Submit Your Presentation in the Table of Contents.
Trimming a presentation
After recording a presentation, you can trim it to cut out unwanted portions.
- Record a presentation.
- Press Trimming.

- Click on the timeline where you would like the presentation to start.
- Press the Set presentation start button.

- Click on the timeline where you would like the presentation to end.
- Press the Set presentation end button.

- If you have changed your mind about trimming, press the Cancel trim button which looks like a red X and your new start and end points will be removed.
| You should have successfully trimmed your presentation. Only the gray portion of your timeline will be included in the final presentation. |
| Parts of the recording in red will be deleted after the cut has been saved or submitted. |
For a more in-depth look at trimming your presentation, see TechSmith Relay Recorder Help and look for Trim the Presentation in the Table of Contents.
Submitting a presentation to the server
- Record a presentation and make any desired changes such as trimming.
- Press Submit.

- Leave your computer on for at least two minutes after pressing Submit to give your presentation time to be sent to the server.
| Your presentation should now be submitted to the server. You should also receive a confirmation email after the presentation has been uploaded. |
For a more in-depth look at submitting your presentation, see TechSmith Relay Recorder Help and look for Preview and Submit Your Presentation in the Table of Contents.
Guest recordings
Click on the “Guest” tab to record content if
- you do not have a username or password.
- your password does not work.
- you do not have an internet connection.
Recording as a guest will allow you to record your content immediately. Once the system has an internet connection, the recorder will automatically transfer the recording to the server. If you entered your UCI email address at the Guest login window, an email will be sent, notifying that the recording is ready to be published. If you did not enter your UCI email address, then the recording must be manually approved by a system administrator. In this case, if you have a preference on which profile to use, email replay@uci.edu immediately to ensure that the wrong encoding profile is not selected.
VIEWING
Viewing a presentation
Once your presentation has been successfully submitted and processed, you will receive a confirmation email with a direct link to your presentation.
If you did not choose Testing/Temporary, University Extension, or one of the Unlisted profiles, you can access your presentations without the direct email link by doing the following:
- Visit https://help.replay.uci.edu/.
- Select the Public index or UCI Only index from Find Recordings.
- Navigate to the folder containing your presentation.
- Select the type of file you want to see from the Viewing Options at the top.
- Locate your presentation and click the link.
Regardless of which profile you selected, you can access your presentations without the direct email link by doing the following:
- Visit https://encoder.replay.uci.edu/.
- Log in with your UCInetID and password.
- Find the desired presentation and click View next to format you want.
You can link to your presentation, or download and save the file.
| You should now be viewing your presentation. |
| Low-resolution monitors may not be wide enough to view the whole width of the presentation.
Use the full screen option in order to view the whole width of the presentation without having to scroll. |
Deleting a presentation
To delete your presentation, please email replay@uci.edu with the details of your presentation including the title and your name. There currently is no process for users to delete the recording themselves.
File types
There are several file types that you will encounter when using TechSmith Relay. Listed below are the different types and what they do.
.HTML files:
- load the SWF video player
- set the video size
.SWF files:
- are the video player (not the video itself)
- add PowerPoint/Keynote chaptering
.MP3 files:
- contain the audio content
.MP4 files:
- contain the video content
.MP4 files (iPod_and_iPhone):
- are the videos optimized for viewing on mobile devices
.JPG files:
- are the video thumbnails and previews
LINKING
Linking your presentation
You can link to your presentation from anywhere, including your EEE EasyWebsite. To link someone to the podcast, simply navigate to the presentation at https://help.replay.uci.edu/, copy its URL, then give that person the URL. You can also link your presentation’s MP4 file to your Sites@UCI website.
Linking to your EEE EasyWebsite:
- Add a “Related Links” section.
- Use this new section to link the podcast.
| Your podcast should now be linked to your EasyWebsite. |
PORTABLE RECORDER
Installing the Portable Recorder
This guide is also helpful for downloading and installing the Portable Recorder.
- Download the Portable Recorder.
- Locate and open the downloaded file named PortableTechSmithRecorder.zip.
- Copy the files from the .zip file onto the portable storage device. All files from the .zip folder need to be copied to the root of the device. The file folder structure should remain intact.
| TechSmith Relay should now be on your portable device. |
For a more in-depth look at using the Portable Recorder, see TechSmith — The Portable Recorder.
Recording with the Portable Recorder
These guides are also helpful for using the Portable Recorder.
- If you are using Windows, open PC TechSmith Recorder.exe. If you are using Mac OS X, open Mac TechSmith Relay.app.
- Log in as a Guest.
You will not be able to log in to the server using your username and password. It will state that there is a password problem. - Record your presentation.
- Press Save to save your presentation to the portable device.
| Your presentation will now be recorded and saved to your portable device. |
For a more in-depth look at recording a presentation on a Portable Recorder, see TechSmith — The Portable Recorder.
Uploading with the Portable Recorder
In order to upload a presentation from a Portable Recorder, the portable device must be plugged into a computer with TechSmith Relay installed.
Uploading a single presentation from a Portable Recorder:
- Open the TechSmith Relay software on the portable device.
- Log in using your username and password.
- Press the Upload List icon.

- Locate the presentation in the window that appears.
- Optional: press the icon of the pencil to edit the title and description of the presentation.
- Press the icon of the arrow to upload that presentation.

| Your presentation should now be uploaded. |
Uploading all presentations from a Portable Recorder:
- Open the TechSmith Relay software on the portable device.
- Log in using your username and password.
- Press the Upload List icon.

- Press Submit All.
- Leave your computer on for at least two minutes after pressing Submit to give your presentations time to be sent to the server.
| Your presentations should now be uploaded. |
Logging In on the Portable Recorder
When using the TechSmith Relay portable recorder, consider the following when you attempt to log in:
- If you run the portable recorder without previously logging in while connected to the server, you are not able to log in. Identify yourself as a guest to use the Upload and Decide Later profile.
- To log in on the portable recorder, you must first connect the portable recorder to the TechSmith Relay server. To do this, connect the mobile storage device to a computer that has TechSmith Relay recorder installed on it. Open the portable recorder and log in as normal.
- Once you have logged into the portable recorder, you can access your profiles when you are not connected to the server.

